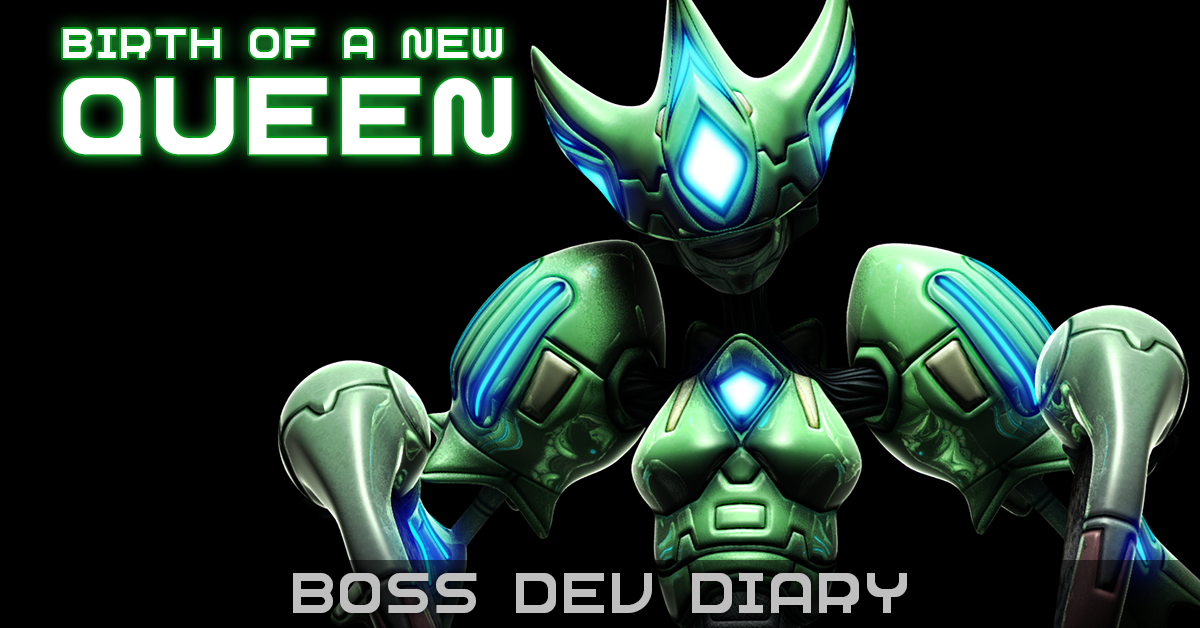
So yesterday I went over the concept for the second boss. With the reference in place I started building mesh.

it is important to keep focused early on, when I reached this point I nearly got confused and built her a kayak
I use basic poly modelling techniques, I’ll build faces and start dragging them into position to match the reference then use those to anchor and position the next piece of detail, subdividing as necessary. I like to build the chunkier shell like parts first then figure out how to join them up afterwards. Getting a few big surfaces blocked in makes me feel like I’m making progress early on and I use a two sided material in MAX with a red inner material for rendering. Seeing back faces helps ‘flesh out’ the model while also reminding me where the holes and gaps are.
Even with a reference, a lot of information gets added at this stage since there’s volume and curvature that isn’t defined in a front and side. Next I needed to tackle the dress, which I know I will have to build in a way that will guarantee it can form a convincing looking sphere…

pretty much all objects can be made more interesting by bevel extruding random faces

 So I figured a sphere can form a convincing looking sphere! I reduced the sphere until it had 13 radial segments (I preferred an odd number so I had a flat piece at the front, as per the concept) and five sections, which was close enough to the six in the concept that I thought it was okay.
The idea for the dress strands is they’ll be duplicates of each other, even sharing the same UV space, so I made one and made sure it would hinge correctly.
Once I was happy with that, I built my top cap (which will be visible when she turns into a ball, but otherwise will hide inside the dress) and duplicated the strands.

yes Cinderella, you can turn into a ball!
Flipping the whole thing upside down, I rotated and animated the strands into rough position to get a sense of how it would look. Cool! Not far off concept! And since I already know it’ll turn into a ball I think this Might Just Work!

this works best if you imagine it’s a movie montage and sing “Eye of the tiger” while you slowly sweep from left to right
Next I set about patching up holes and connecting up the floating parts. This is normally pretty cruisey because I’m just filling in details based on the direction I established earlier. For attaching her pruning shears to the forearm, I decided to go for a four pronged housing, since the ball could then rotate freely within it, I thought it’d give me a greater range of motion.
I’m generally working with the mesh set to See-Through at this stage, and as I tend to model the whole thing as one mesh, I’m selecting and using Hide Unselected whenever I need to get in and edit something clearly.

observant eyes will notice the lack of a tongue, as blowing raspberries at Cactus is an attack pattern reserved for the third boss
Unlike Embryo, this character has a mouth and is capable of smiling, so I need teeth. I generally start with a tube, cut down the detail, shape and flip for the bottom set. Then I can join the lips to the base of the teeth and it pretty much works for the level of detail I’m going for.
At this point I’ve got it following the concept art pretty closely. The proportions have been concerning me, her head seems too large for the kind of character she’s meant to be, and she isn’t quite as proud and lanky as I was originally picturing. Ditching the reference, I shrink the head, lengthen the forearms and lift the shoulders a touch. Minor stuff, but I feel better about how she’s looking

her hat also got pointier, a crucial distinction
And that’s the mesh! Next time I’ll cover UVing and rigging hopefully!